30 Tips for New Photographers!
January 28, 2024
Getting started as a new photographer can be overwhelming, so I’ve put together some tips! These tips for new photographers are only a starting point, and each section could be an article on it’s own! I hope these little tips can help you navigate your start in the exciting field of photography! [Some links might be affiliate links and I could earn a small commission on qualifying sales, with no cost to you].
Tips for Knowing Camera Settings as a New Photographer
1. Know your camera
When I get a new camera, I always read through the manual! There are always hidden menus, different buttons that can be customized etc. Even if you don’t understand everything, giving the manual a quick look over can be great for identifying concepts you need to learn more about!
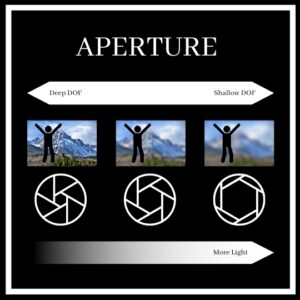
2. Understand aperture
Aperture is how much light your lens allows into your camera with each shot. A smaller number means a wider aperture which means a shallower depth of field. A larger number means a more narrow aperture and a deeper depth of field.
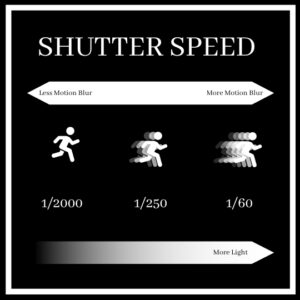
3. Understand shutter speed
Shutter speed is how long the camera is open to allow light into the cameras sensor. A shutter speed of 60 means the shutter is open for 1/60th of a second. A shutter speed of 1000 means the shutter is open for 1/1000 of a second. A faster shutter means you can capture moving options faster. A slower shutter speed will show blur, either from movement of your subject or even your hands moving when taking the photo. This can be a desired effect as you start getting creative!
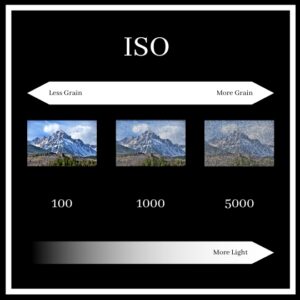
4. Understand ISO
ISO is essentially how sensitive your camera is to light. In the days of film, ISO correlated to the size of the silver crystals on the film. Bigger crystals allowed the film to be more sensitive (aka faster, because the shutter speed could be faster since it was more sensitive). Bigger crystals caused grain. Finer crystals made less grain, but because they were smaller, more light was required (slower shutter speed or wider aperture).
5. Understanding the exposure triangle – combining aperture, shutter speed and ISO
Points 2, 3, and 4 are incredibly abbreviated summaries of those topics. But you can start to see how each setting – ISO, Shutter Speed and Aperture – affect how much light is getting to the sensor (film) to create your photo. If you change one setting, you will have to change another setting to compensate.
6. Learning White Balance
A lot of photographers will use auto white balance and there’s nothing terribly wrong with that. However each time you have something on “auto”, there’s a chance the camera will get confused and make the wrong decision. White balance was the last setting I switched into manual mode. Shooting in Kelvin is essentially the manual mode of white balance. By setting your own white balance, you can ensure your photos will look the same moment to moment. This is great for doing quick batch edits because they will all need the same adjustments (if any).
Tips for Learning Composition as a New Photographer
7. Basic Rules of Composition
When starting, try to avoid just pointing and clicking. Try to focus on compositional elements that will enhance your photos and elevate them to the next level. Learn about the rule of thirds, golden ratio, leading lines, natural framing and more!

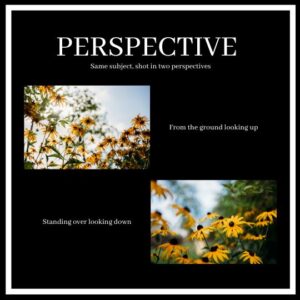
8. Try different perspectives
Shooting at a subject from exaggerated high or low perspectives can have interesting effects! You can also use this to hide background elements you might not want to see, or line up your subject with certain background elements.
9. Learn when to “break rules”
Learning when to break these rules can help you start conveying different emotions in your photos. For example, putting a subject in the rule of thirds is visually appealing. Breaking this “rule” and putting something right in the center can give a dramatic effect.
Learn to See the Light!
10. Shoot at golden hour
Shooting when the light is overhead will create harsh shadows. When you’re learning, try shooting just before sunset during “golden hour”. As you grow your skills, you can begin attempting more challenging light.
11. Play with light placement
Have a friend come our during golden hour and notice the difference when you position them directly in front of the sun vs just to the side of the sun vs 90 degrees from the sun so it’s out of your frame. Try to keep all things equal and just rotate your self / subject so you can see the difference in amount of haze, shadows, and sunflare you will get. Learning to control these elements and use them artistically will elevate your photos.
12. Find spots of open shade
When you are required to shoot during a less than ideal time – for an event, for example – learn to find spots of shade where you can look up and see the sky. Open shade will create a nice even light on your subjects and prevent harsh shadows.
13. Play with shadows
Sometimes shadows might be wanted to get a specific feeling or effect. Play with a piece of lace or some interesting patters like a palm or fern and see how the shadows can affect the images feel.
Continue to Grow as Photographer
14. Study other photographers work
While comparing your work as a new photographer to those with years of experience isn’t healthy, it can be valuable if done right. When looking at someone else’s work, try to notice elements that you like about that photos. Notice their composition, their lighting, etc.
15. Study your own work
Again, do this in a constructive way! Look at your photos and if you love the photo, try to pinpoint what elements are giving you the look and feel you’re loving. And if it isn’t one of your favorites, try to find what you might change next time, and then go practice that!
16. Look how far you’ve come!
Once you’ve been shooting for 6 months or so, check out some of your older work and appreciate how far you’ve come!
17. Meet other local photographers
Try to find some local photographers and go location scouting together. You can practice taking photos of each other, share all the highs and lows of your new business, and have someone to lean on for advice or inspiration. You can also collaborate on different projects!
18. Try photography challenges
There are so many Facebook groups with weekly challenges. This can push you to try new techniques or to find new subject that you otherwise wouldn’t. It can also be fun to see how other photographers interpreted the same prompt! You’ll see a mix of beginner photographers and seasoned all shooting the same topic!
Trouble Shooting Common New Photographer Issues
19. Photos are blurry
Check your camera settings! Try to determine if you’ve missed focus, or if your shutter speed was too slow. If it’s too slow, speed it up and compensate with another part of the exposure triangle.
20. Photos are too grainy / noisy
This is most likely to happen when shooting in dark environments or indoors. Check your ISO – you’ve likely cranked it up to high and need to lower it. You’ll have to either open your aperture wider or slow your shutter speed to compensate.
21. Shooting in dark / indoors
Learn the limits of your camera. You can only raise the ISO so much before the noise in the photo will become just too much. You will also have to learn how slow you can drop your shutter without getting motion blur. This will depend on if you have a cooperative subject vs an animal or child running around. A shorter focal length can also tolerate a slower shutters speed. If you can’t lower your ISO without dropping your shutter speed too much, you might be time to learn about flash!
Tips for Choosing Your Gear as a New Photographer
22. The best camera is the one you have
My favorite tip for new photographers? You can learn basics on any camera. I learned on a film camera where I couldn’t see the results until my photos were developed. This allowed me to be very deliberate with my settings. DSLRs are great for learning as you can’t just change settings and see what happens, you’ll have to actually take the photo. With mirrorless cameras, using live view you can see the immediate effects that changing settings will have on your photos. You do not need the fanciest camera to learn, and in fact, an older camera with less automations might actually be beneficial when learning to be deliberate.
23. Try a prime lens
There will be hundreds of lenses to choose from. A prime lens has a single focal length and usually has a wider aperture. The wider aperture allows you to shoot in darker situations, as well as getting the beautiful background blur from a shallow depth of field. 50mm is a great starting lens as it’s a versatile focal length. With a prime lens you won’t be able to “zoom” in, rather you will “zoom” by moving your feet. Learning to move during a photoshoot will ultimately help you become better at composition by not becoming stuck in one spot.
24. Consider a tripod
Not only can a tripod help you avoid camera shake, you can also practice all these techniques using yourself as a subject! Taking self portraits are easier than ever when using an app synched to your camera. This is my favorite tripod – not only is it affordable, it’s sturdy, and easy to level and adjust your positions.
Tips for a New Photographers Camera Bag
After years of doing family photography, here’s a few things I love keeping in my camera bag.
25. Safety first, always
I love having this little safety device with me at photography sessions or when scouting. It attaches to my camera bag and I can activate it quickly to make a loud noise. I’ve never had to use it, but it makes me feel a bit safer.
26. Tons of lens cloths
You’ll know you’re a real photographer when you start losing lens cloths, and finding them all over. I specifically love these ones because they can clip right onto my bag or beltloop.
27. Save your back, get a nice harness!
If you ever expect to use two camera bodies, I suggest getting a dual harness even as a beginner photographer! You can adjust them to fit your body, and save yourself a little back pain! Here is my favorite harness – it’s sure professional looking, provides great support, and is super durable!
Mindset for New Photographers
28. Don’t compare your step 1 to someone else’s step 6
Meaning, everyone has a starting point, and you can’t compare your work to someone who has been working at this for years!
29. Experiment!
In the age of digital photography, you can easily experiment with new techniques. Even if it’s not something you end up using long term, experimenting with different lighting or different camera settings can teach you so much!
30. Learn learn learn!
There is so much free content available to help you learn new techniques for shooting or editing. Take advantage of YouTube videos or Facebook groups for some amazing content for free! That being said, when you feel ready to invest in more education, and have found an educator you resonate with, don’t be afraid – you can definitely take your work to the next level.
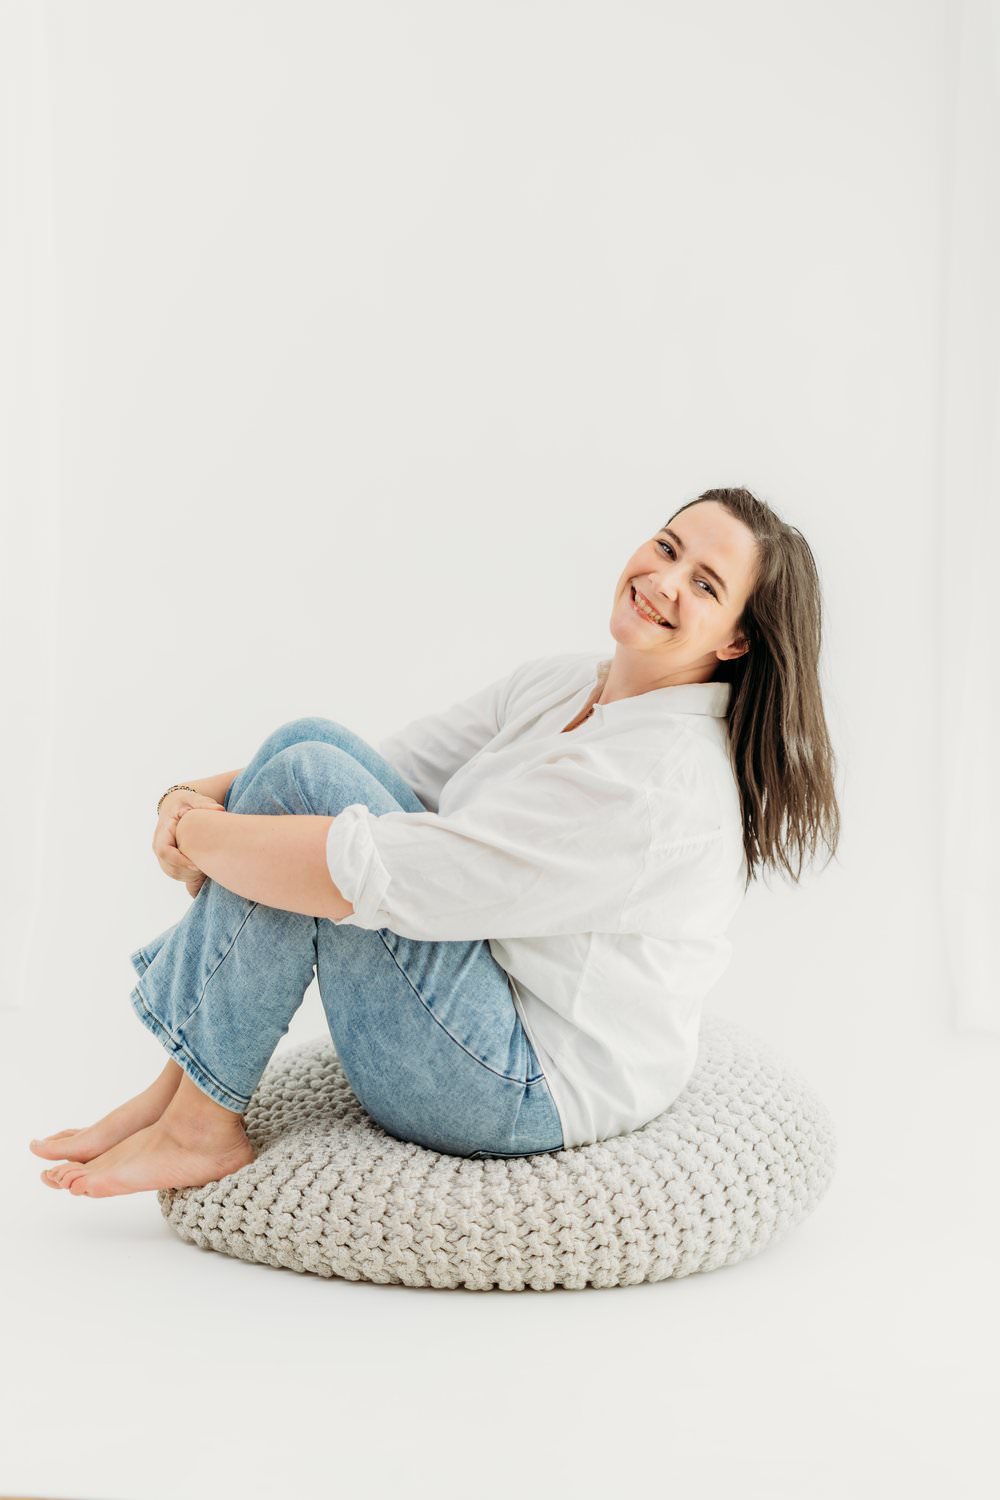
Jenn Chen is a family, maternity and newborn photographer in the Walnut Creek area. While she works with families of all sizes, she specializes in working with young children and toddlers (she has a 4 and 6 year old of her own!). Jenn has been photographing families since 2017 but has had a passion for photography since she was a child. Jenn has a photography studio in Concord which is currently open for newborn sessions and children’s portraits.
Jenn is a member of NAPCP and as of 2024 was recognized as a “Master of Family Photography” based on her current portfolio. As of 2025, Jenn was accepted as one of NAPCPs California ambassadors. Jenn has won multiple awards including 1st place in newborn category in 2024, 1st and 2nd place in Maternity category in 2025 and has been recognized with 7 photos in NAPCP’s Inspired Gallery in 2026 Jenn is also a member of Nikon Professional Services.
Leave a Reply Cancel reply
Serving Walnut Creek, Martinez, Concord and beyond!
Jenn Chen Photography Studio
2455 Bates Ave
Suite K
Concord CA
text: (925) 338-1511
Walnut Creek, Martinez, Lafayette, Concord, California
Plymouth-Canton, Michigan
2455 Bates Ave
Suite K
Concord, CA
back to top
family photography but make it fun!
Jenn Chen
Photography
@jennchenphotography
jenn@jennchenphotography.com
Text: (925) 338-1511
Navigate
PLEASE COMMENT BELOW